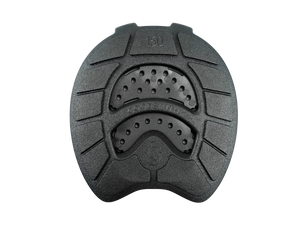
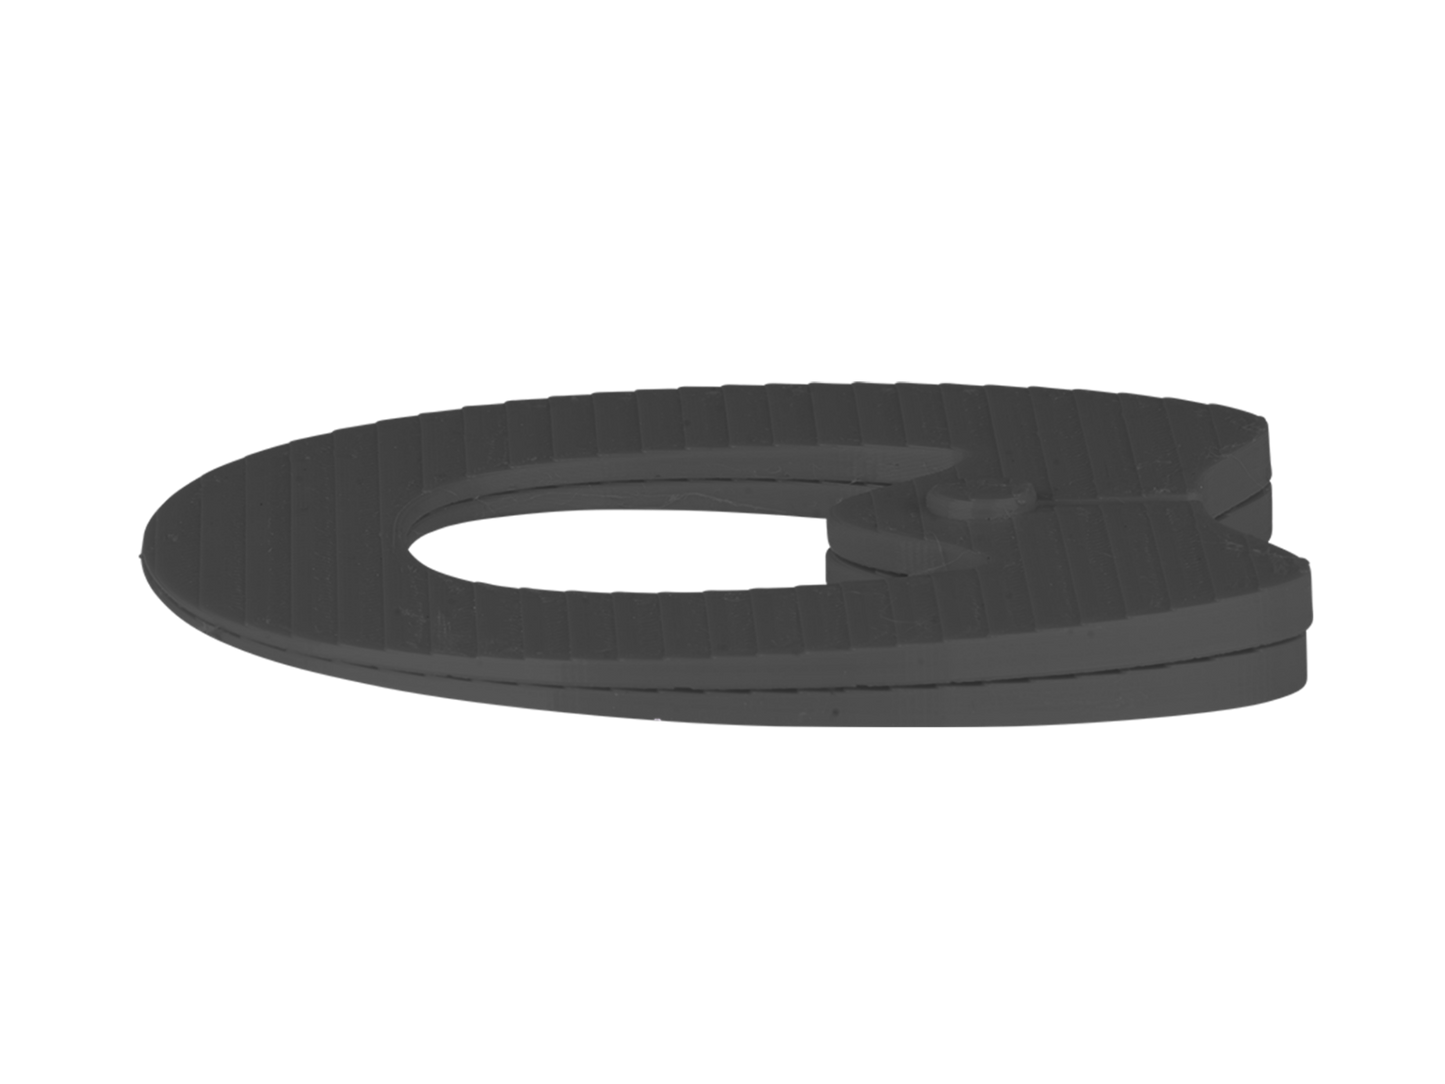
Wedge 2.5°
Wedge 2.5°
Wedge 2.5°
Wedge 2.5°
Wedge 2.5°
Wedge 2.5°
Wedge 2.5°

Wedge 2.5°

Regular price€8,95
/
Tax included. Shipping calculated at checkout.
  • In stock, ready to ship
  • Backordered, shipping soon

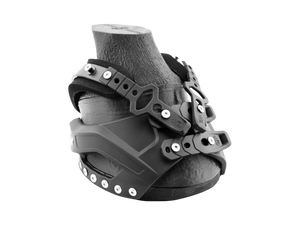
Our Goodsmith wedges for the professional hoof trimmer.

The wedges can be combined in 2.5° increments and welded to the base plate. The plug-in system, in conjunction with the XT40-Pro, ensures optimal centering on the matching base plate.

Caution! Wedges should always be used with great care and only by professional and experienced hoof trimmers.

Shipping & Returns

🚚 Delivery Times

Current delivery times can be found on each product page. We usually ship by the next business day after the order and payment are received.

  • Germany: 1–3 business days
  • EU (except DE): 1–5 business days

🔁 Returns

You can return items within 30 days conveniently via our returns portal.

Please make sure that the items are:

  • unused,
  • complete
  • and in original packaging.

Alternatively, you can send your return – stating the order number and reason for return – to the following address:

Goodsmith GmbH
Robert-Koch-Straße 1
82152 Planegg
Germany

📦 Shipping Costs & Options

Germany

  • GLS Parcel KlimaProtect: €5.95
  • DHL Parcel: €5.95
  • DHL Parcel Shop Delivery: €6.95
  • Orders over €100: €4.95
  • Orders over €200: Free shipping

Austria & Netherlands

  • GLS EuroParcel KlimaProtect: €9.95
  • DHL Parcel: €12.95
  • Orders over €100 GLS: €8.95
  • Orders over €200: Free shipping

Rest of EU

  • GLS EuroParcel KlimaProtect: €14.95

Switzerland

  • GLS EuroParcel KlimaProtect: €14.95

Professionals receive special conditions. To activate your prices, log in with your professional account.

Liquid error (snippets/image-element line 113): invalid url input

Matching

1. Pre-fixing the wedge

Use the XT-40 Pro to pre-attach the wedge to the base plate. The groove in the heel area will help you position it.

2. Adjusting the base plate

Now draw the hoof outline on the base plate (or wedge) as usual and bring everything into the desired shape.

3. Welding

Now use the heat gun to weld the wedge and the tab. As with the tabs, it's better to weld a little too tightly than too thinly.

4. Secure the weld

As long as the TPU is still soft/liquid, you can connect the two parts by running your finger (wearing gloves!) over them.

5. Attach the tabs

Weld the tabs along the top edge so they connect to both the wedge and the base plate. If you're using two or more wedges, make sure the welds are especially good!

6. Done!

Ready to be presented to the horse. Of course, you can add the usual finishing touches, like the bevel.

Goodsmith Partner

Business people

Register for free & benefit from numerous advantages!

You might also like